Blog / Customer address management
Customer address management
Managing customer addresses in the admin dashboard should be easy. We’re making it happen.

Through merchant feedback and our own observations, we recognized that some much needed improvements are due. We’re starting with making it possible to create and manage multiple addresses for each customer.
A little bit of background
The Swell admin dashboard handles addresses in a singular fashion. At least, that’s how it appears to those managing orders in the dashboard but we’ll get to that. A customer can have a single shipping addresses attached to their account, and that address will be used to populate a shipping address by default when creating an order. The shipping address for an individual order can be manually changed and that will not make any permanent changes to the shipping address on file for that customer.
For the Swell developers out there, you’re probably already aware that more than a single address can be stored and queried for individual customers. That ability however, has never been made available to those that use the admin interface to manage orders. The data is there, it just can’t be accessed from the dashboard
Customers don’t live stationary lives and the destinations for their orders will change. Home, a place of business, relatives, and friends.
Let’s fix the problem
As of now, you have the ability to create and manage as many customer addresses you require, right in the Swell dashboard. Not only that, you can also do it multiple places. Whether you’re making changes via the customer’s profile, or creating an order for that customer, you’ll be able to make address changes when you need to.
From the customer profile
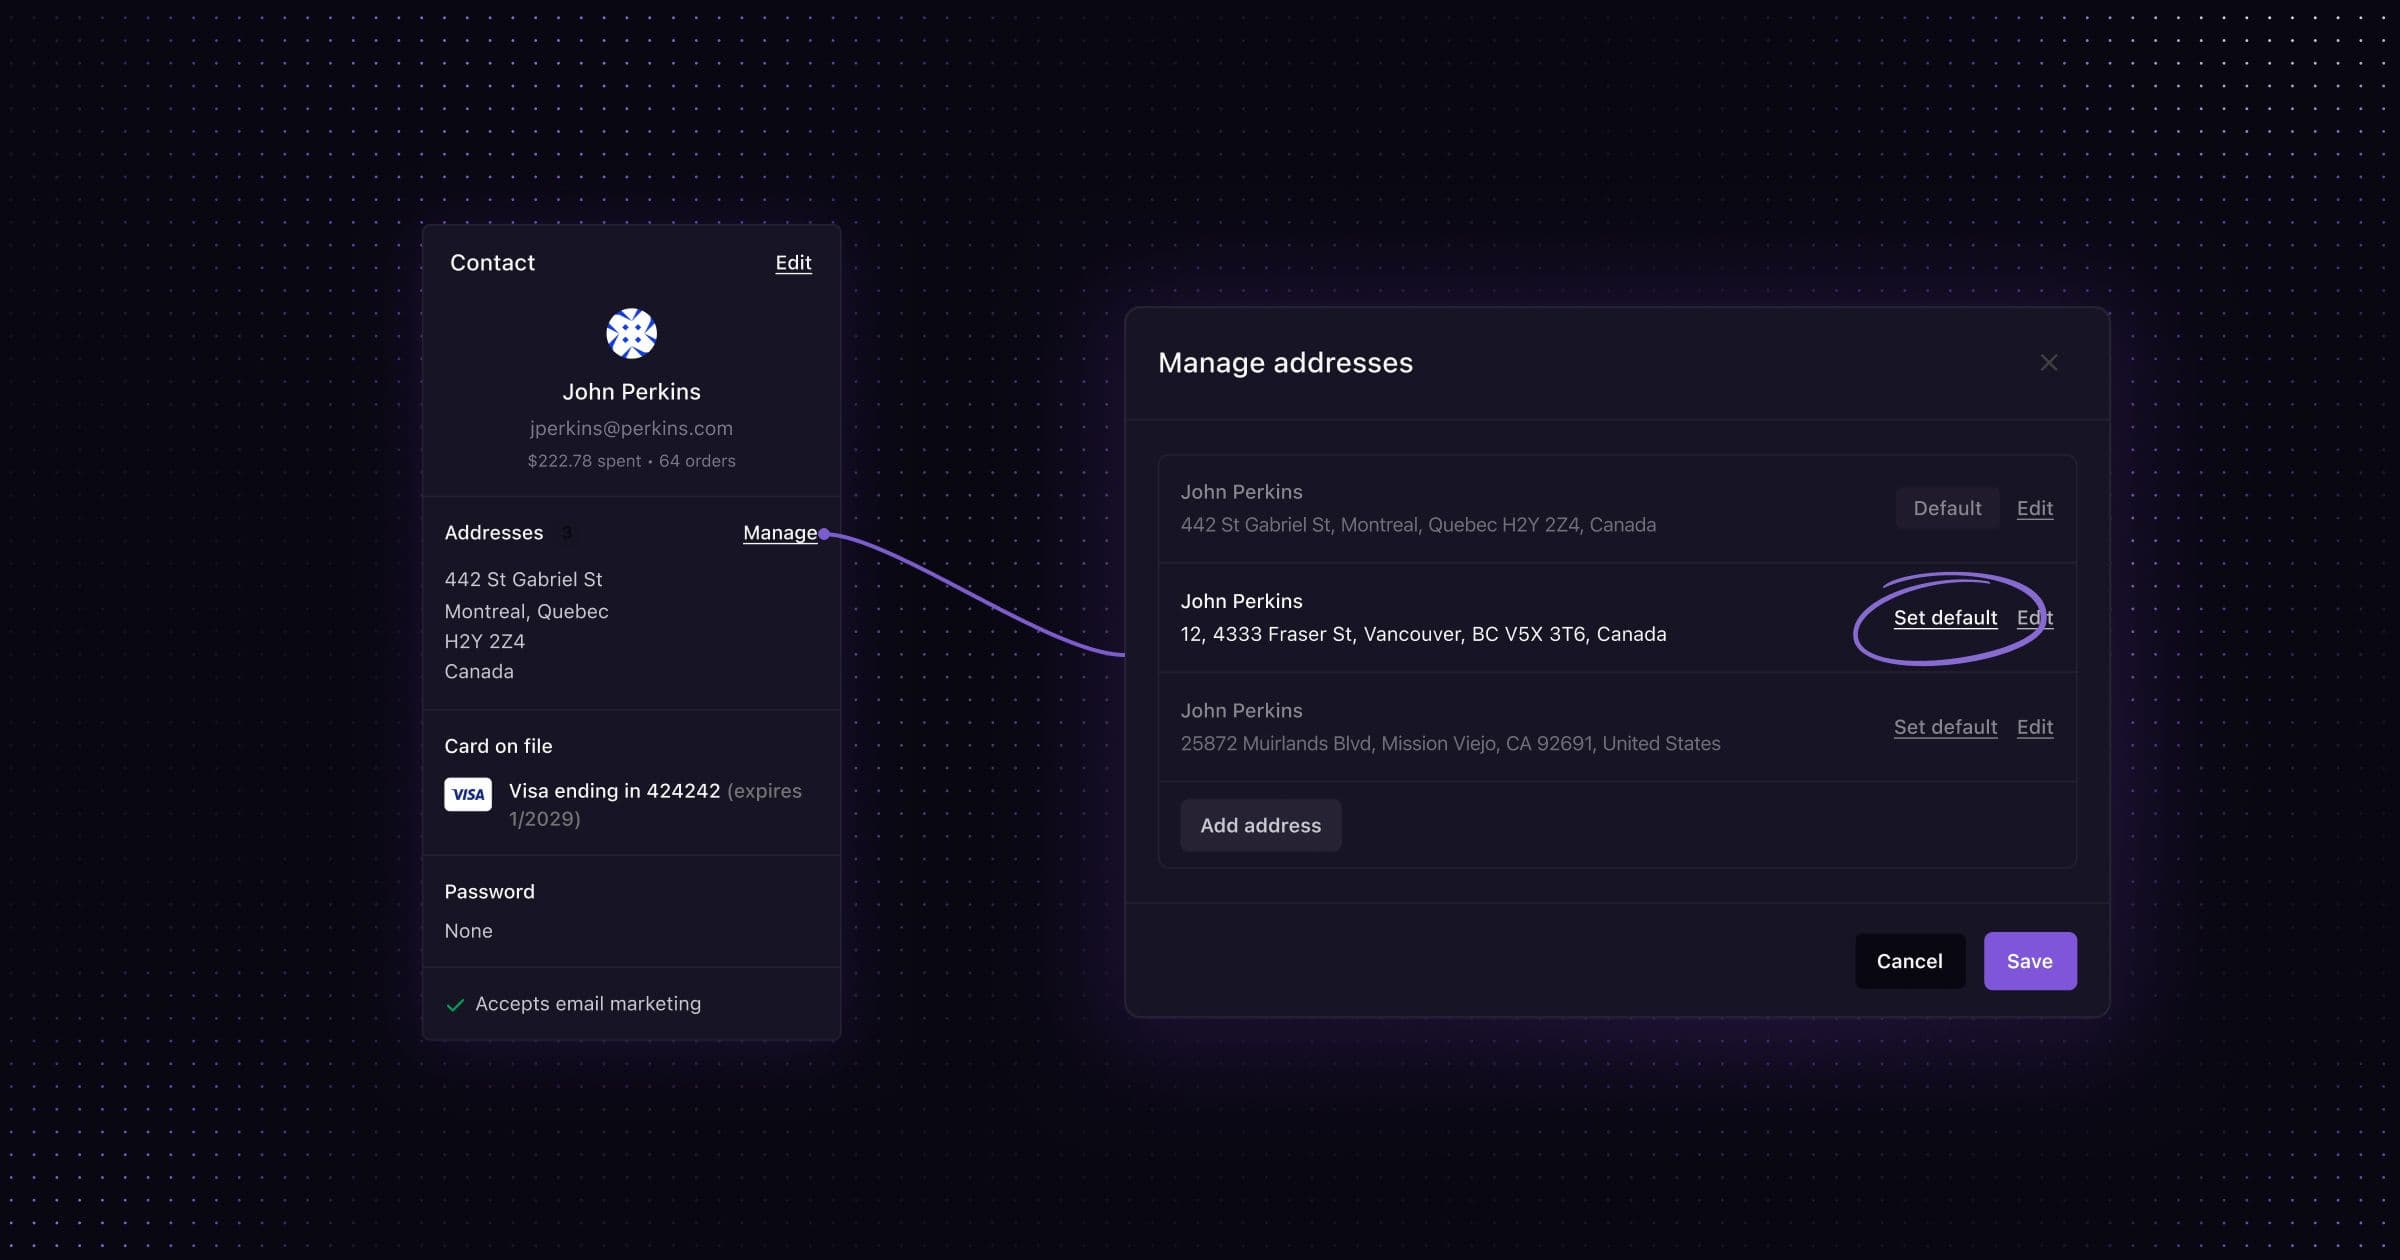
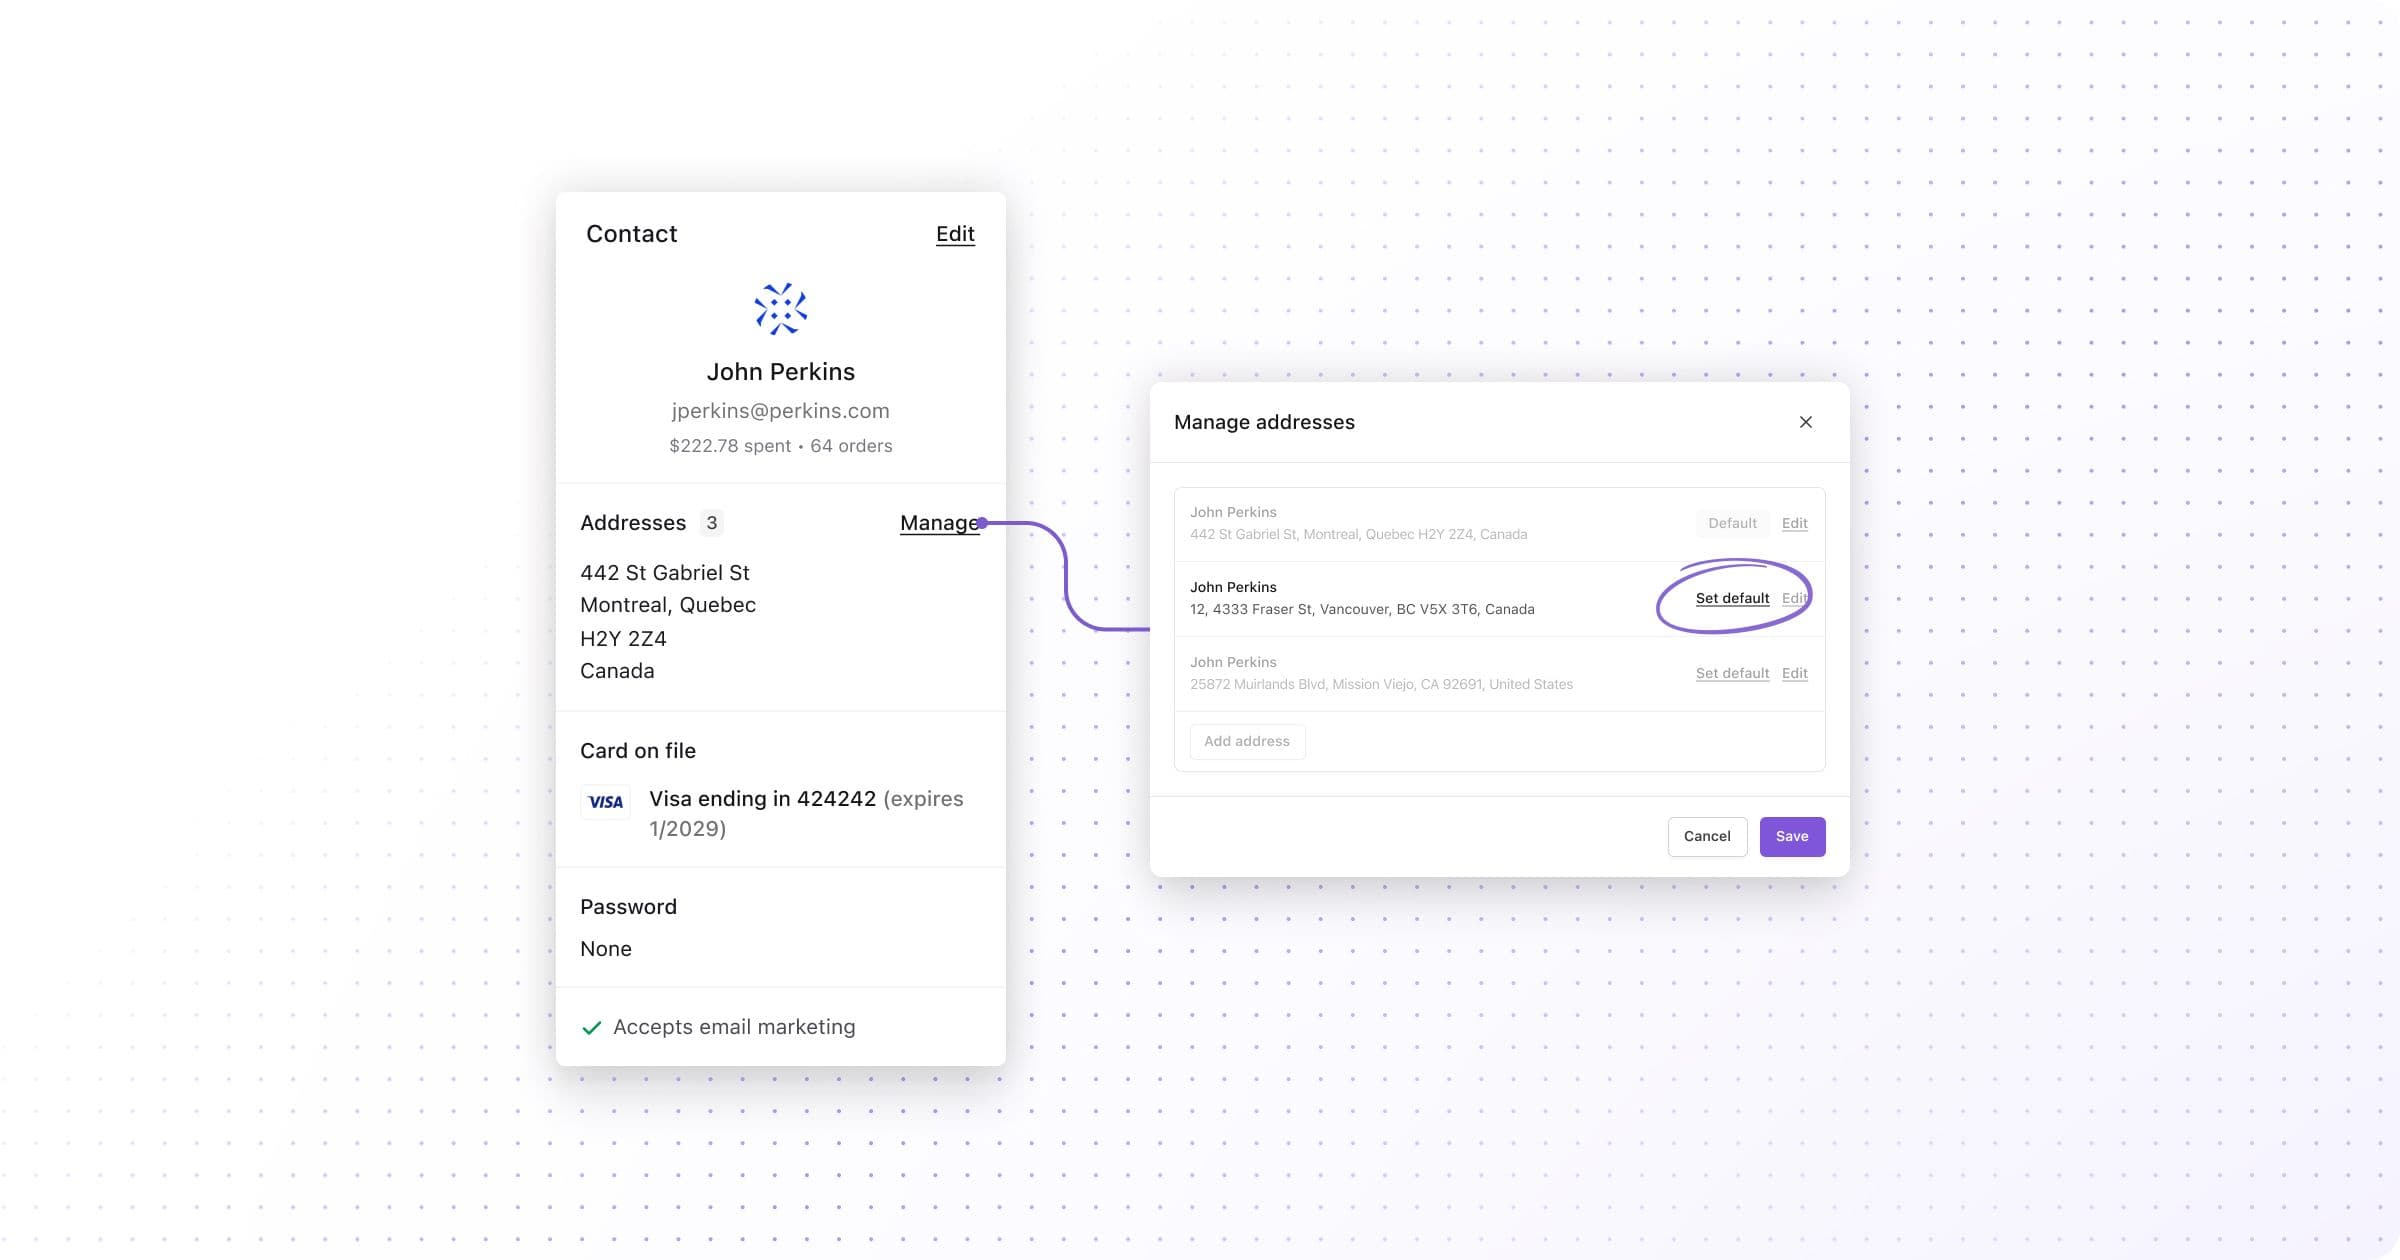
The customer shipping address can currently be changed under the shipping address section of the right side panel. That section has now be changed to the display the current default address, as well as the total number of addresses on file for that customer. You’ll also noticed that the main action has been changed from Add or Edit, to Manage.
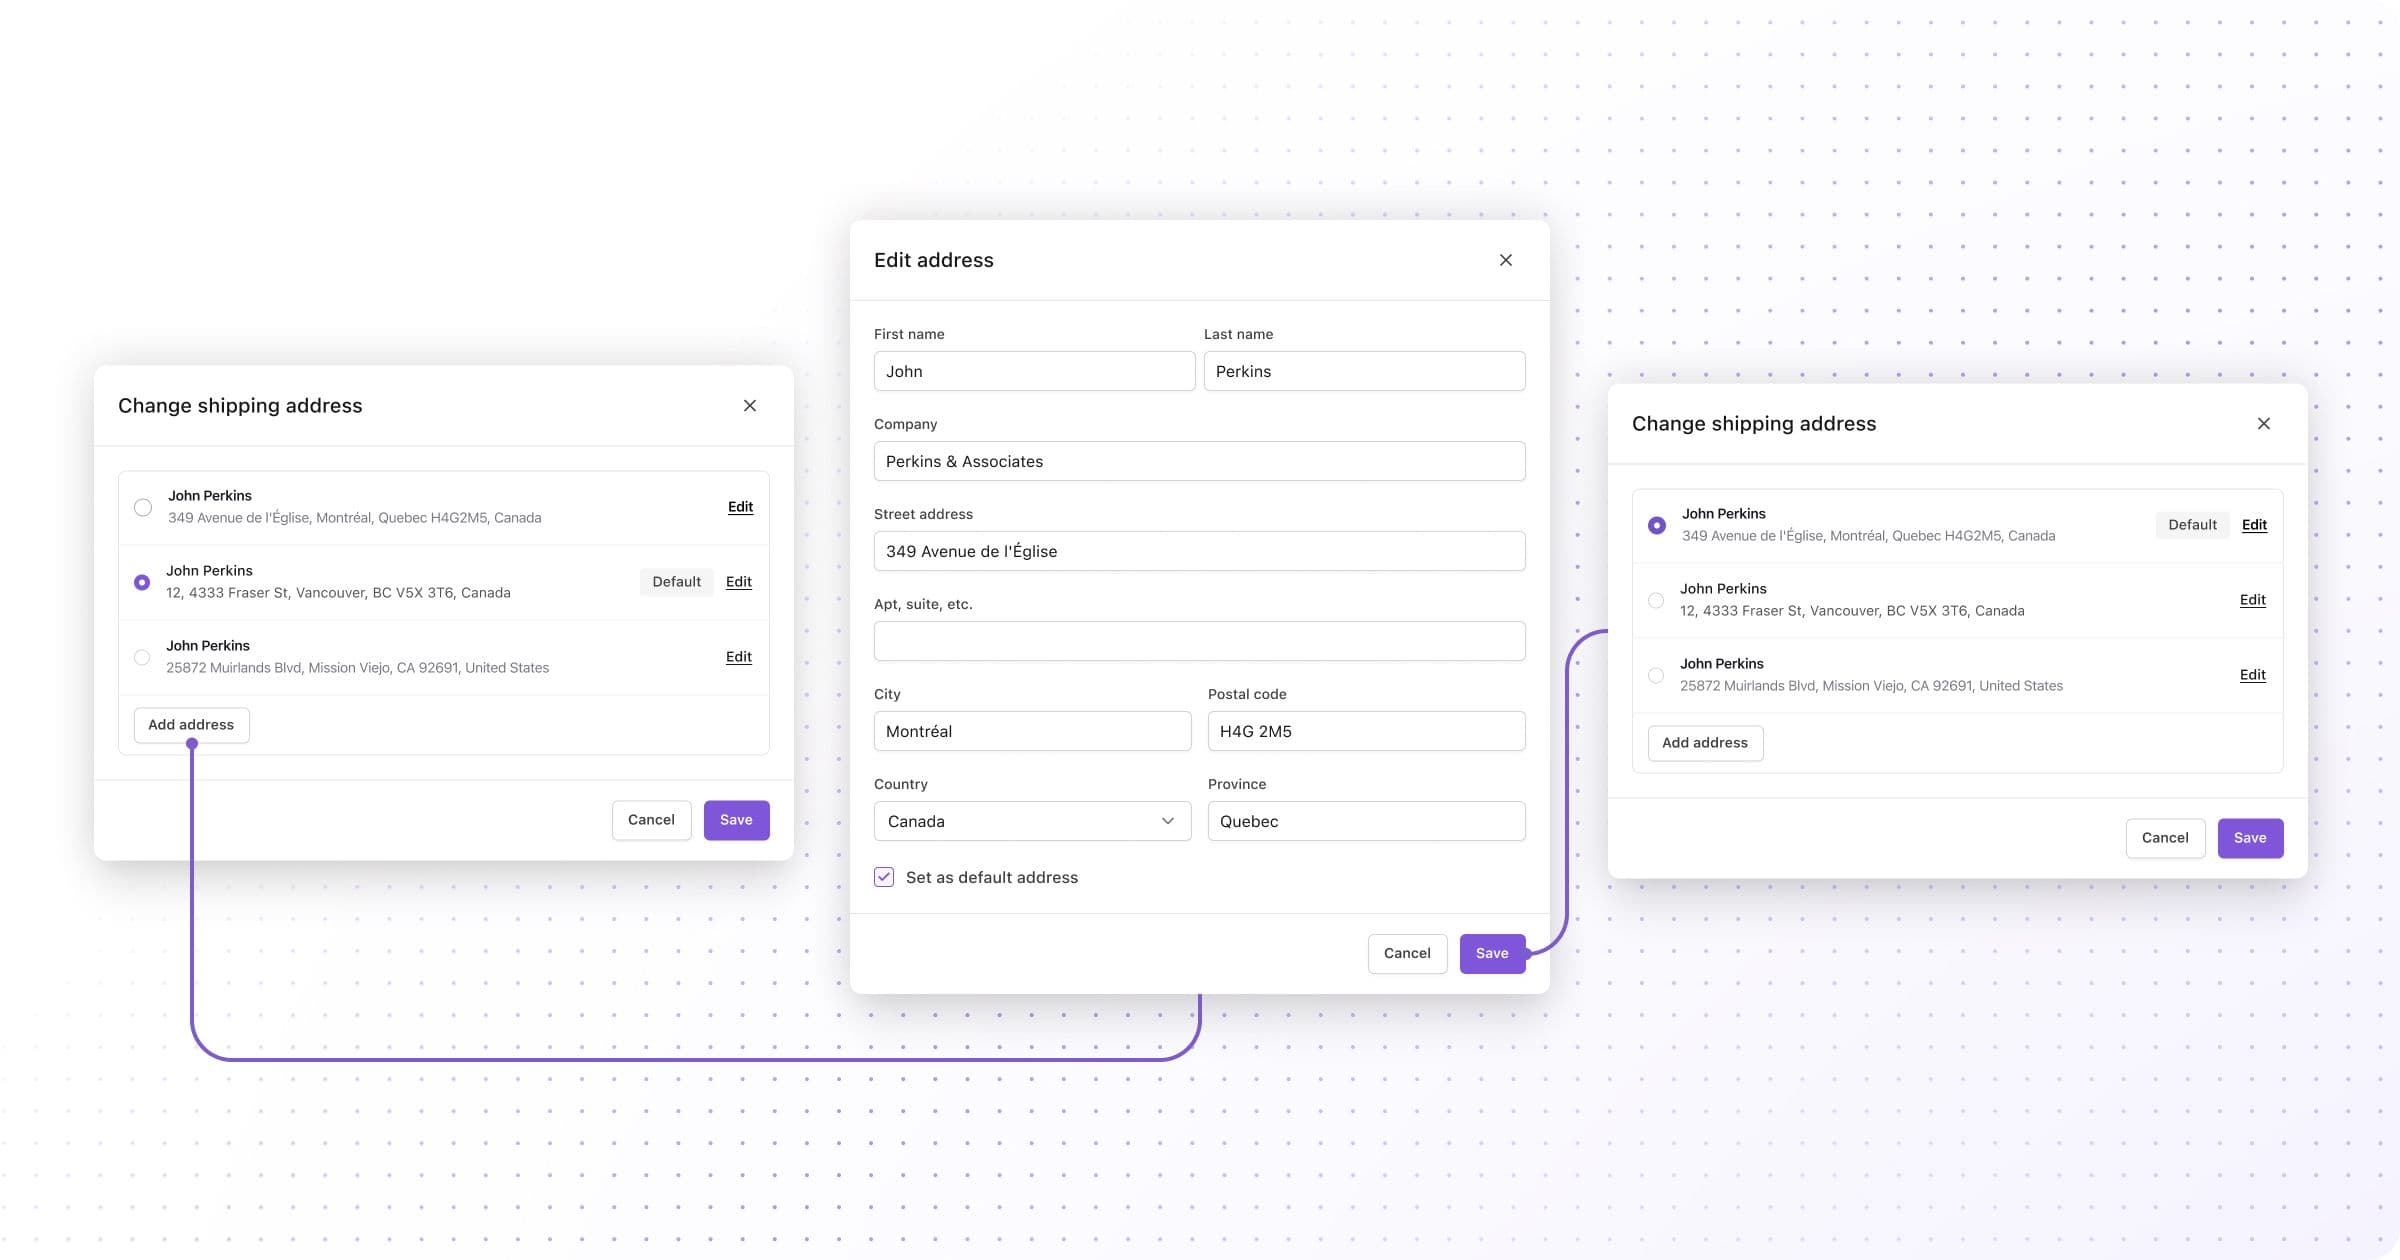
Clicking on the Manage button will present you with a list of addresses for the current customer. If you need to make changes to an address, clicking Edit will provide you all of the familiar fields. Simply make your changes and save them. Need to remove an address? Just use the Remove address button located at the bottom of the same window.
Creating a new address is easy. On the list of addresses, you’ll find a button labeled Add address. This will present a blank set of address input fields. Add your new address, save your changes, and your new customer address has been created.

Working with orders
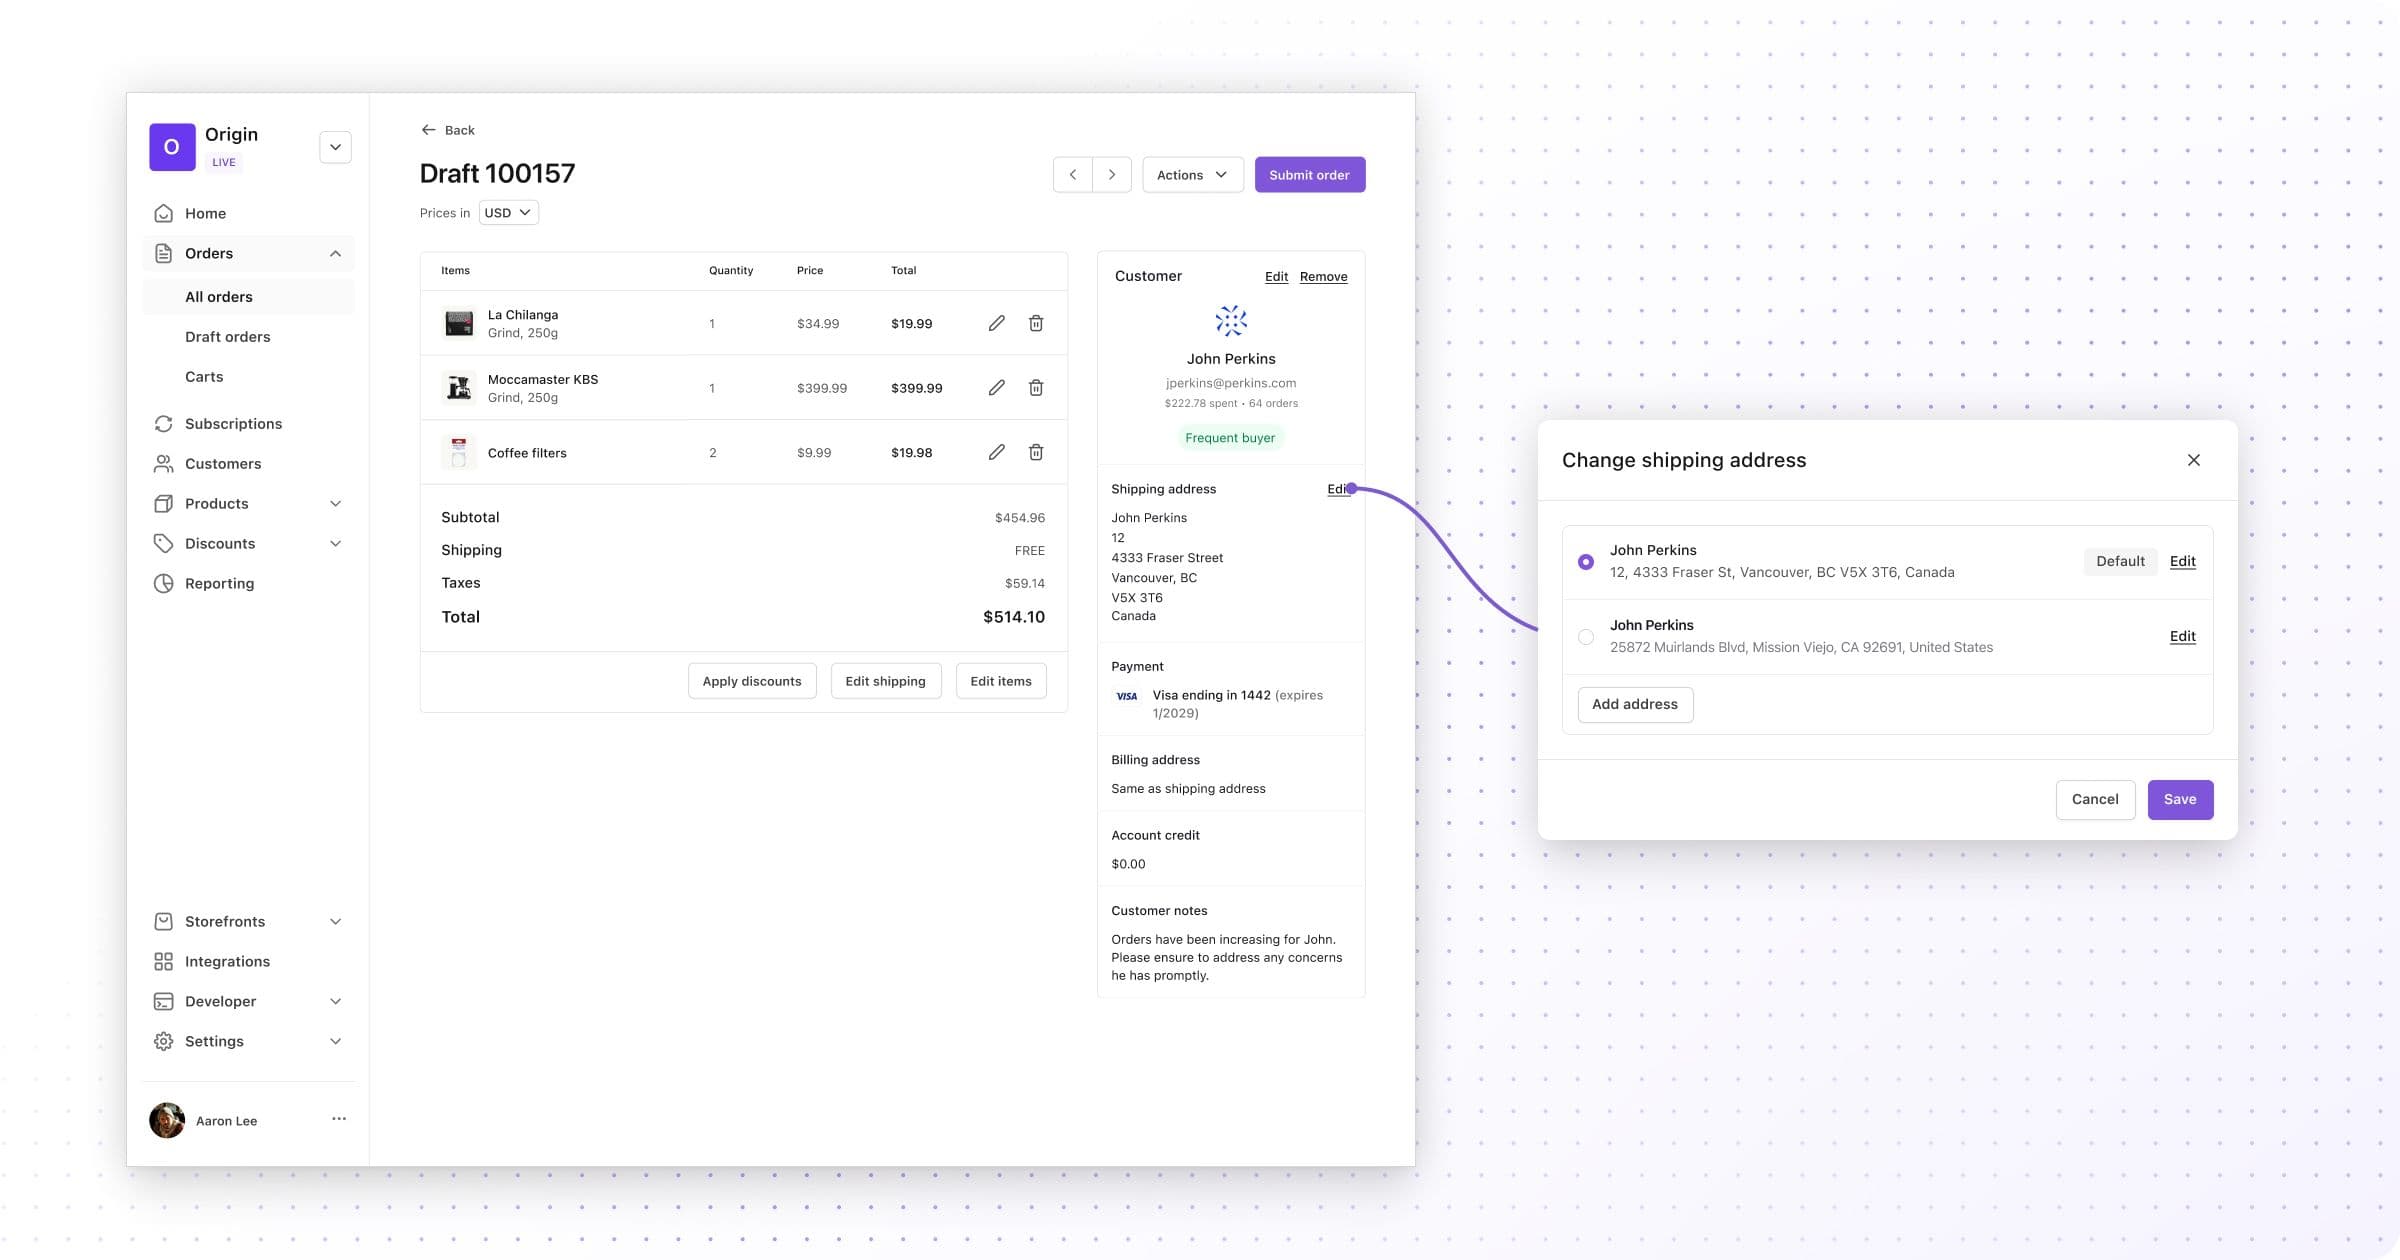
When creating an order, the shipping address section will be automatically populated using the default address for the customer added to the order. The Edit button will display the same list of addresses where you can perform most of the same actions without leaving your current workflow. You can continue to add, edit, or delete addresses. The main difference here is that these addresses are now selectable. Choose the address you would like to use for the order, save your changes, and the selected address will be applied for use on the current order.

Setting a default address
In the customer profile, located in the list of addresses, you’ll now see a button labeled Set as default. To set a new default, click that button, and you’re done. That address will now be used as the default address when creating orders.

We hope that these changes make it easier for you to work with multiple customer addresses. As always, we welcome, and look forward to your feedback.
Up next
right to your inbox