Blog
Build your ecommerce store with Next.js Commerce v2 and Swell on Next 14
Discover the simple steps to build and launch an ecommerce website by leveraging Next.js, Swell, and Next.js Commerce.

Discover the simple steps to build and launch an ecommerce website by leveraging Next.js, Swell, and Next.js Commerce.
This guide provides an overview of how to quickly create high-performance ecommerce websites on Swell using Next.js Commerce. With this starter kit, you can clone, customize, and deploy your own store in just a few clicks.
And for more, be sure to watch this tutorial by Hamed Bahram of Monogram on the same topic: Build an e-commerce store using NextJs 13 and Swell.
Updated article:
This article has been updated to include the functionalities of Next.js Commerce 2.0.
- App Router Conventions: Using React Server Components, Server Actions, built-in layouts, metadata, and all the new patterns from the recently released App Router.
- Dynamic Storefront: Edge-rendered, dynamic storefront, at the speed of static. Customize content without sacrificing performance.
- Simplified Architecture: Next.js Commerce is now a single provider per repository, resulting in less code and fewer abstractions for your application.
You can read more about on their blog post
Next.js Commerce
Next.js Commerce offers a range of benefits, such as image optimization rendering, internationalization, and analytics reporting. It also includes advanced features like incremental static generation, eliminating the need to manual trigger webhooks. It also simplifies the development process by providing a fully styled UI components for core ecommerce functionality, and automatically generating default settings for Swell.
This guide uses Vercel as a hosting solution—Vercel offers hassle-free asset serving through the CDN and seamless integration with Next.js' automatic static optimization and API routes.
Features:
- Next.js App Router
- Optimized for SEO using Next.js's Metadata
- React Server Components (RSCs) and Suspense
- Server Actions for mutations
- Edge Runtime
- New fetching and caching paradigms
- Dynamic OG images
- Styling with Tailwind CSS
- Checkout and payments with Swell
- Automatic light/dark mode based on system settings
Getting started
First, create a store in Swell. Hit this link and follow the signup steps.
Once you’ve created an account, you’ll need to deploy Next-Commerce directly from Vercel.
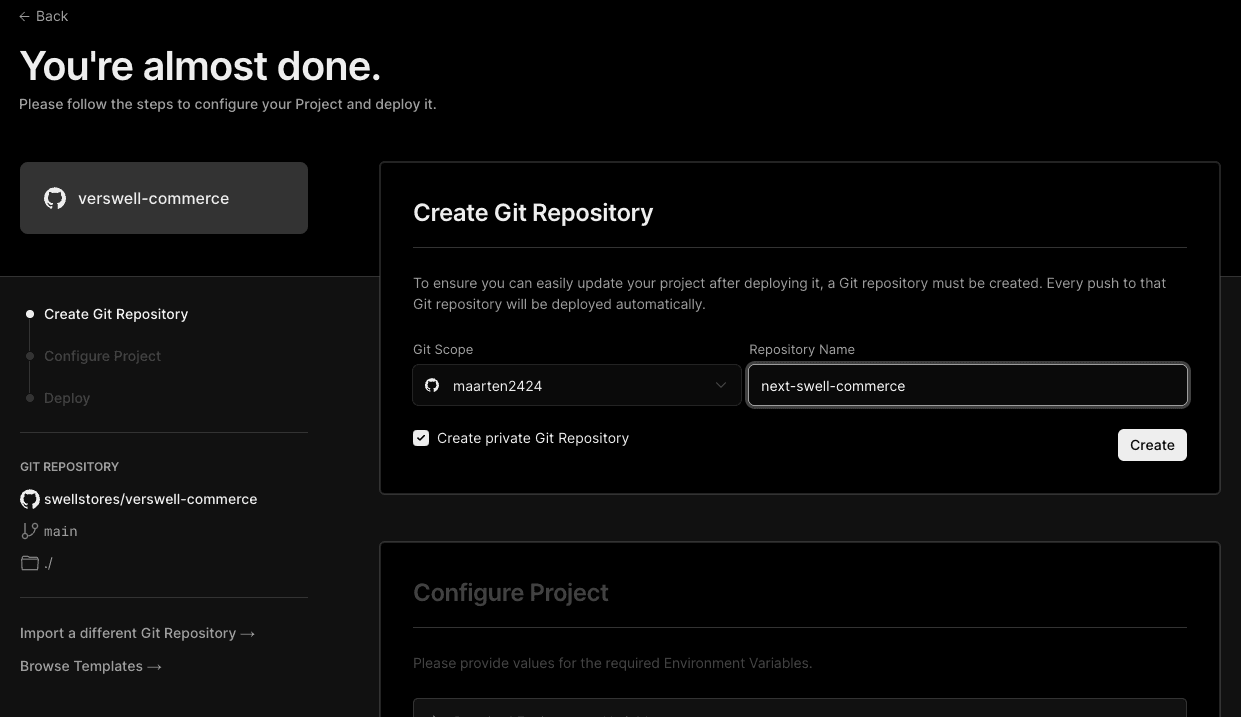
Clone and Deploy
1. Click this magic button to deploy the starter kit directly to Vercel.
2. Create a git repository on Github, Gitlab, or Bitbucket. You might need to set up further permissions if prompted.
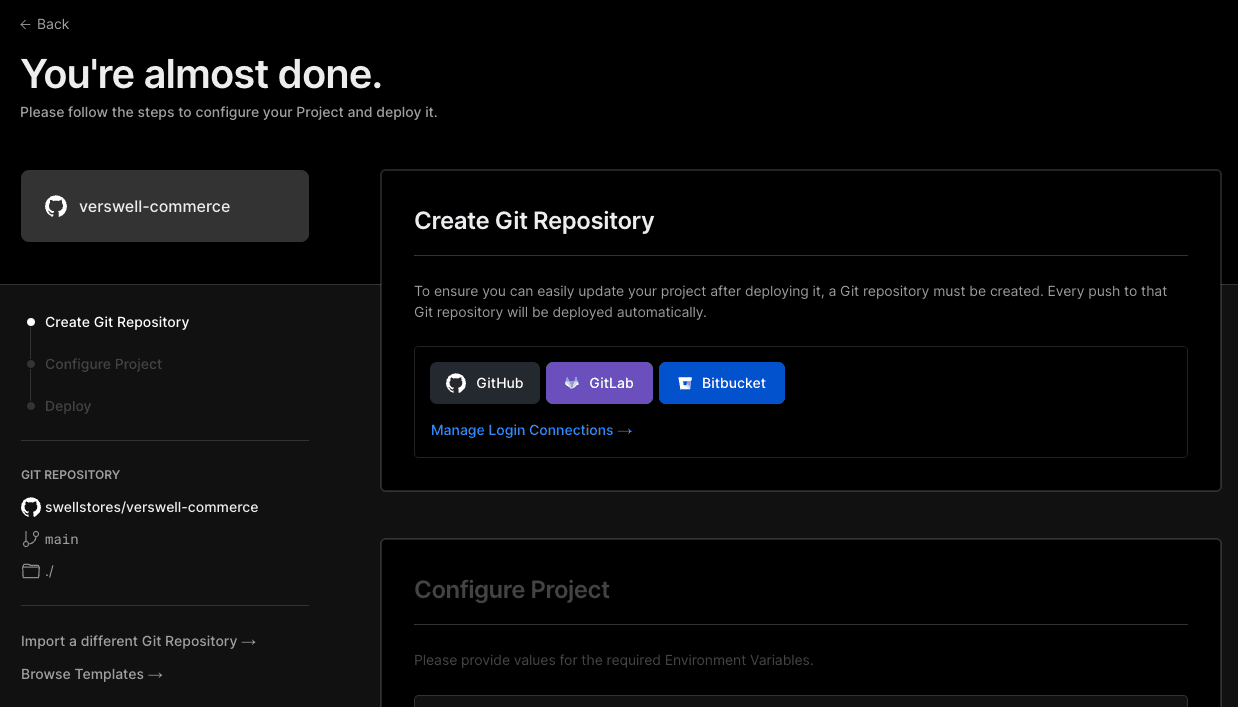
3. Give your new repository a name, and click Create.
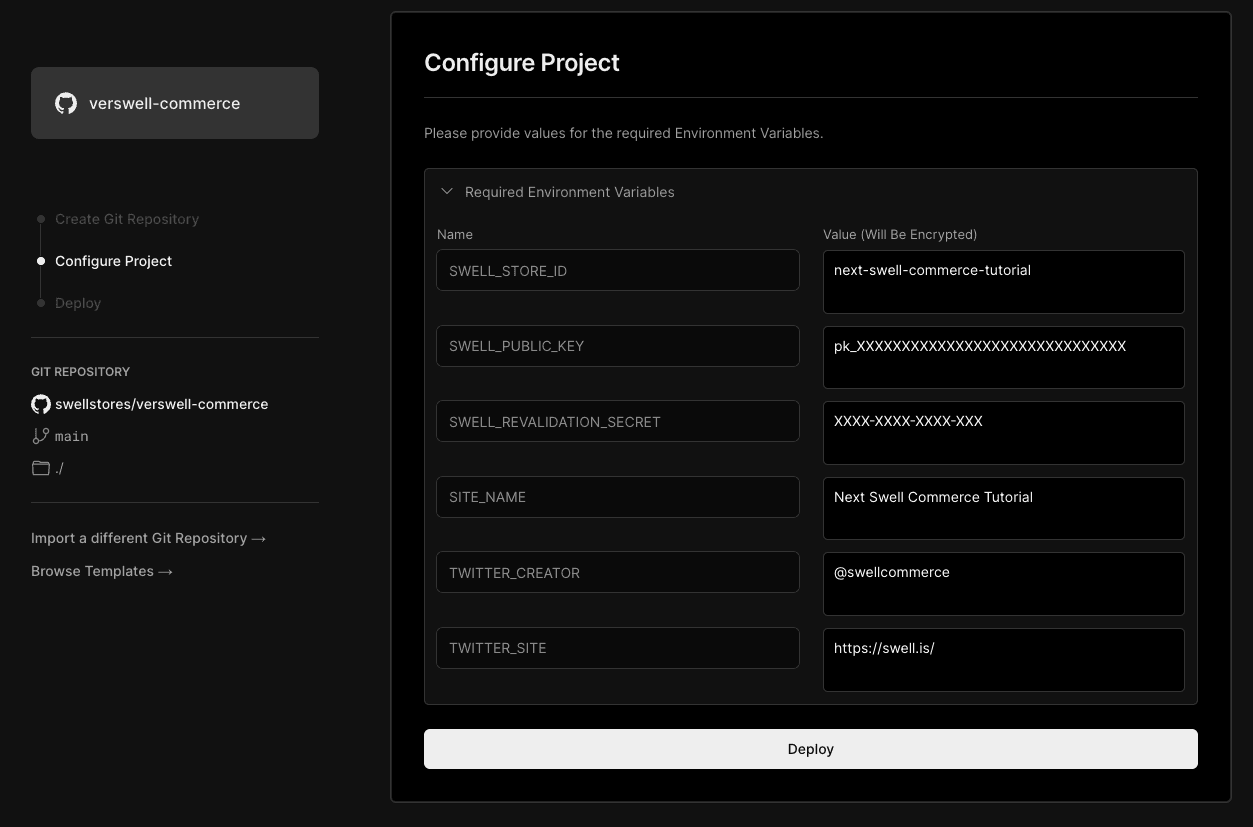
4. Add the required environment variables. For the SWELL_REVALIDATION_SECRET, we recommend using a random generated key
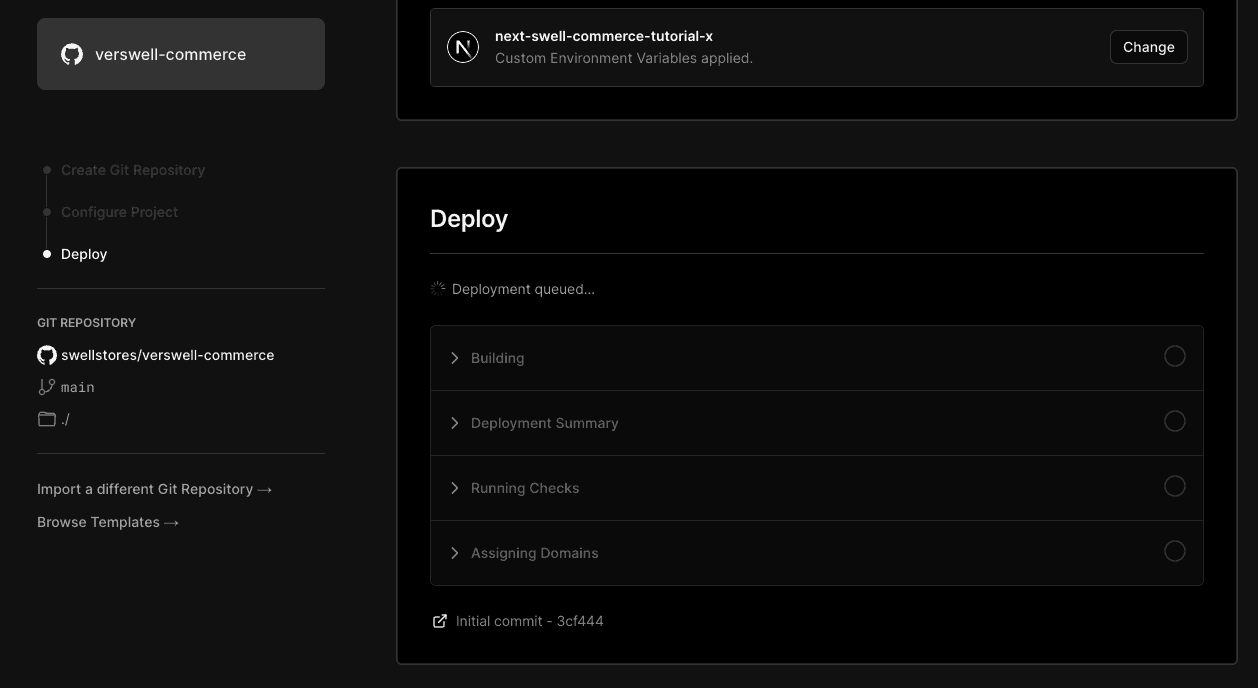
5. You’re done! 🎉 You’ve successfully deployed your project on Vercel.
Running the project locally
To customize your store, you’ll need to make some changes locally. Make sure you’re running git and node.js in your system. Next-Commerce uses pnpm as a package manager — which is up to 2x faster than yarn or npm and more efficient.
In the repository you’ll find a monorepo with the following the App Router conventions:
/app → Routes and layouts.
Pages
page.tsx → /
product/[handle]/page.tsx → /product/some-product
search/page.tsx → /search
search/[collection]/page.tsx → /search/t-shirts
Layouts
layout.tsx → Default layout
/components → Components
/lib → Here you’ll find the swell library for vercel commerce, plus the generated types from your store
Clone the repository and run this command to install:
$ pnpm install & pnpm build
Once you have cloned the project, you’ll need to create a .env file based on the .env.example provided within the project. The file requires your Swell Store ID and your public API key — both of which can be found in the Swell dashboard under Developer > API Keys.
In the .env, provide your Swell Store ID and public API key in the following format:
COMPANY_NAME="Vercel Inc."
TWITTER_CREATOR="@vercel"
TWITTER_SITE="<https://nextjs.org/commerce>"
SITE_NAME="Next.js Commerce"
SWELL_PUBLIC_KEY=pk_XXXX
SWELL_STORE_ID=XXXX
SWELL_REVALIDATION_SECRET=XXXX
With the .env file configured with your Swell store information, you’re ready to deploy your storefront. Fill out any additional settings or configurations, and you're ready to deploy on your hosting provider of choice.
And to run the dev server:
$ pnpm dev
Customization
Removing this section in favour of Production Deployment
Production deployment
Configure on-demand incremental static regeneration (ISR)
Using on-demand revalidation in Next.js is recommended to optimize data fetching and serve requests from cache unless data is changed.
We can do this with Swell's webhooks triggered by certain model events, which can notify your Next.js app when data it depends on has changed.
The following webhook events are pre-configured in /app/api/revalidate/route.ts and automatically revalidate the Next.js cache.
- product.created
- product.deleted
- product.updated
- category.created
- category.deleted
- category.updated
The above product events are triggered when variants are added, updated, and removed, as well as when stock is updated.
Note: If you add functionality that uses data from other models, you will need to configure the relevant events to listen for in /app/api/revalidate/route.ts.
Set up secret for securing webhook requests
- Create your own secret or generate a random UUID.
- Create an environment variable named SWELL_REVALIDATION_SECRET and use the value from step 1.
Configure webhooks in Swell
- Navigate to https://SWELL_STORE_ID.swell.store/admin/settings/webhooks.
- Add a new webhook pointing to https://DEPLOYMENT_URL/api/revalidate?secret=SECRET, where DEPLOYMENT_URL is the domain where your app is deployed, and [SECRET] is the secret you just created.
- Select the six product and category events listed above. You can add more sets for other preview urls, environments, or local development.
Conclusion
We have only just begun to explore all that Next.js Commerce has to offer. There is still a lot more for us to discover and develop with Swell and Next Commerce. We are actively striving to improve our own SDK to be used by many platforms and to include all the features that Swell offers.
Follow us on Twitter and get involved in our discussions for the latest updates.